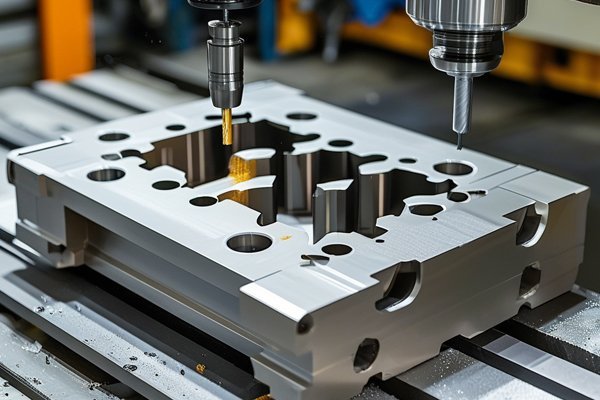
Did you know that the surface finish of machined parts can significantly impact their performance and longevity? In the world of CNC machining, achieving a specific surface finish, such as the RA 0.8 finish for aluminum parts, is crucial for applications ranging from aerospace to automotive industries. A study by the American Society of Mechanical Engineers (ASME) revealed that nearly 70% of machining failures can be traced back to inadequate surface finishes. This statistic underscores the importance of understanding how tool wear management can help achieve desired surface finishes.
In this blog, we will explore the intricacies of achieving an RA 0.8 finish on aluminum parts through effective tool wear management. We will delve into the factors influencing tool wear, the techniques to monitor and manage it, and the best practices to ensure consistent surface quality. By the end of this article, you will have a comprehensive understanding of how to optimize your machining processes for superior results.
Understanding Surface Finish and Its Importance
What is Surface Finish?
Surface finish refers to the texture and smoothness of a machined surface. It is typically measured in terms of roughness average (RA), which quantifies the average deviation of the surface profile from a mean line. An RA 0.8 finish indicates a relatively smooth surface, which is often required for components that will be subjected to friction, wear, or aesthetic considerations.
Why is Surface Finish Important?
Factors Influencing Tool Wear
The properties of the aluminum alloy being machined can significantly affect tool wear. Factors such as hardness, ductility, and thermal conductivity play a role in how quickly a tool will wear down.
The choice of cutting speed, feed rate, and depth of cut can influence tool wear. Higher speeds and feeds can lead to increased heat generation, accelerating wear.
The material of the cutting tool itself is crucial. Tools made from high-speed steel (HSS), carbide, or ceramic have different wear characteristics and lifespans.
Using the right coolant can help dissipate heat and reduce friction, thereby minimizing tool wear. The choice of coolant type and application method can make a significant difference.
The design of the cutting tool, including its shape and angle, can impact how it interacts with the material and, consequently, its wear rate.
Effective Tool Wear Management Techniques
Implementing a system for regular monitoring of tool wear can help identify issues before they lead to significant problems. Techniques such as visual inspection, measurement of cutting edge geometry, and surface finish analysis can be employed.

Using data analytics and machine learning algorithms, predictive maintenance can forecast when a tool is likely to fail based on historical wear patterns. This proactive approach allows for timely tool changes, minimizing downtime.
Adjusting cutting parameters based on real-time feedback can help manage tool wear effectively. For instance, reducing the feed rate or cutting speed when excessive wear is detected can prolong tool life.
Applying coatings to cutting tools can enhance their wear resistance. Coatings such as TiN (Titanium Nitride) or TiAlN (Titanium Aluminum Nitride) can reduce friction and improve tool longevity.
Ensuring that operators are well-trained in best practices for tool handling and machining techniques can significantly reduce tool wear. Regular training sessions can keep the team updated on the latest advancements in tool technology and machining strategies.
Achieving RA 0.8 Finish: Step-by-Step Process
Step 1: Material Selection
Choose the appropriate aluminum alloy that meets the requirements for your application. Consider factors such as machinability, strength, and surface finish requirements.
Step 2: Tool Selection
Select cutting tools that are suitable for the chosen aluminum alloy. Consider using carbide tools with appropriate coatings for enhanced performance.
Step 3: Setting Cutting Parameters
Determine the optimal cutting speed, feed rate, and depth of cut based on the material and tool specifications. Use manufacturer recommendations as a starting point and adjust based on real-time observations.
Step 4: Implementing Coolant
Choose the right coolant for your machining process. Water-soluble coolants can provide excellent cooling and lubrication, while oil-based coolants may offer better lubrication for certain applications.
Step 5: Monitoring Tool Wear
Regularly inspect tools for signs of wear. Use measurement tools to assess the cutting edge and ensure it remains within acceptable limits.
Step 6: Adjusting Processes
Based on monitoring results, adjust cutting parameters as needed to manage tool wear and maintain the desired surface finish.
Step 7: Final Inspection
After machining, conduct a thorough inspection of the finished part to ensure it meets the RA 0.8 finish requirement. Use surface roughness testers to quantify the finish and make adjustments in future runs as necessary.
Achieving an RA 0.8 finish on aluminum parts is a multifaceted process that requires careful consideration of tool wear management. By understanding the factors influencing tool wear and implementing effective management techniques, manufacturers can ensure high-quality surface finishes that meet industry standards.
In summary, the key techniques covered in this blog include regular monitoring of tool wear, optimizing cutting parameters, using appropriate tool materials and coatings, and ensuring proper training for operators. These practices not only enhance the quality of the finished product but also contribute to the overall efficiency and profitability of machining operations.
As you reflect on the importance of surface finish in your machining processes, remember that investing in effective tool wear management is not just about achieving a specific finish; it’s about ensuring the reliability and performance of your components in their intended applications. Embrace these strategies, and watch your machining quality soar.


