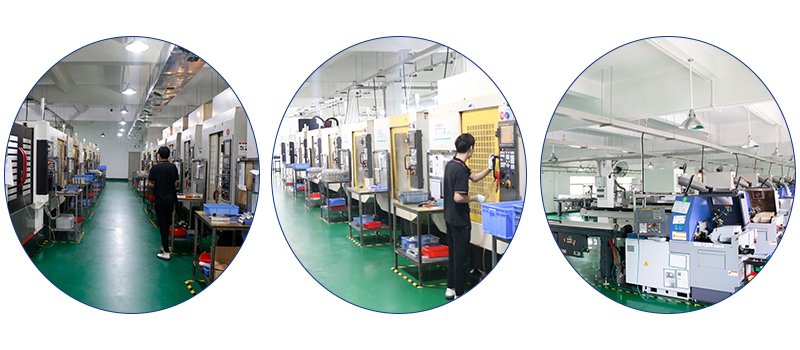
As a robotics enthusiast, I’ve always been amazed by the role CNC machining plays in creating precise, durable, and highly customizable parts for DIY robots. Whether you’re designing a simple hobby bot or a sophisticated autonomous robot, the structural integrity and precision of its components can make or break your project. In this guide, I’ll dive into how CNC machining enables the manufacturing of high-quality robot parts and share tips to optimize both structure and precision.
1. Why CNC Machining Is Ideal for DIY Robot Parts
When it comes to DIY robotics, the importance of robust and accurate components cannot be overstated. CNC machining is the go-to method for fabricating parts because of its:
- Precision: CNC machines can achieve tolerances as tight as ±0.01 mm, ensuring that every piece fits perfectly.
- Material Variety: From aluminum and steel to plastics like Delrin, you can choose materials that match your robot’s functional and structural needs.
- Scalability: Whether you’re producing a single part or dozens, CNC machining offers flexibility without sacrificing quality.
💡 Fun Fact: Many components in industrial-grade robots are manufactured using CNC machining. It’s a technology trusted by professionals and accessible for DIYers.
2. Structural Optimization: Designing for Strength and Efficiency
Creating durable yet lightweight parts is essential for any robot, especially if it needs mobility or load-carrying capabilities. Here are some design tips:
a. Material Selection Matters
Choose materials that align with your robot’s purpose:
- Aluminum: Lightweight and corrosion-resistant, great for chassis and frames.
- Stainless Steel: Strong and durable, ideal for heavy-load components.
- Plastics (e.g., PEEK, Delrin): Lightweight and flexible, suitable for non-load-bearing parts.
💡 Pro Tip: Aluminum is often the best choice for most DIY robots due to its balance of weight, cost, and machinability.
b. Weight Distribution
Keep the center of gravity low for stability. When machining structural components, ensure weight is evenly distributed to avoid tipping or imbalance during movement.
c. Reinforce Key Stress Points
For moving parts or joints, add fillets and chamfers to reduce stress concentrations and prevent premature wear.
3. Precision Optimization: Achieving Flawless Motion and Fit
a. Tight Tolerances for Moving Parts
For joints, gears, and other moving components, precision is crucial. Loose tolerances can cause backlash, while overly tight fits can increase friction and wear.
💡 Pro Tip: Consult your CNC machining provider to ensure tolerances match the part’s function. For example, a ±0.05 mm tolerance might be enough for a frame, but ±0.01 mm is better for gears.
b. Smooth Surfaces for Reduced Friction
Parts like bearings and shafts benefit from polished finishes to reduce wear and improve efficiency. CNC machining can deliver surface finishes as fine as Ra 1.6 μm, ideal for such applications.
c. Alignment and Repeatability
For parts that interact, such as motor mounts or sensor holders, precision alignment ensures consistent performance. Always verify dimensions with a caliper or micrometer after machining.
4. Key CNC Techniques for DIY Robotics
a. 3-Axis CNC Machining
This is sufficient for most simple parts like brackets and plates. It’s cost-effective and widely available.
b. 5-Axis CNC Machining
For complex geometries, such as curved surfaces or multi-directional features, 5-axis machining minimizes setups and achieves higher accuracy.
c. Custom Tooling
Certain robot parts, like deep pockets or sharp edges, may require specialized tools. Discuss these needs with your CNC service provider to avoid compromising on design.
5. Common Challenges in CNC Machining for DIY Robotics
a. Overcomplicating Designs
While complex shapes may look impressive, they can increase machining time and costs. Simplify wherever possible without sacrificing functionality.
b. Material Wastage
Optimize your design for material efficiency. For example, use hollow structures where possible to reduce waste and weight.
c. Post-Machining Adjustments
Sometimes, even CNC parts require post-processing. Ensure you have access to tools like sandpaper or a deburring tool for fine adjustments.
6. Cost Optimization: Getting the Most Bang for Your Buck
For DIY projects, budget constraints are often a concern. Here’s how to keep costs in check:
- Order in Batches: Many CNC shops offer discounts for multiple parts.
- Use Standardized Dimensions: Designing parts to fit common stock sizes can reduce material costs.
- Leverage Prototyping: Start with inexpensive materials like plastic to test designs before committing to metals.
💡 Pro Tip: At YL-Machining, we work closely with clients to identify cost-saving opportunities without compromising on quality.
7. Real-Life Example: Building a Robotic Arm
Let’s say you’re building a robotic arm. Precision is vital for smooth joint movement, while structural strength ensures it can lift objects. Using CNC machining, you could:
- Frame: Machine the arm sections from aluminum for lightweight durability.
- Gears and Joints: Use steel for high-load components to ensure longevity.
- End-Effector (Gripper): Opt for plastic or lightweight alloys for dexterity and efficiency.
By optimizing materials, tolerances, and finishes, you can create a robotic arm that performs reliably in various tasks.
Final Thoughts: Turning Ideas Into Reality
CNC machining empowers DIY enthusiasts to bring their robotic visions to life with precision and durability. By understanding the principles of structural and precision optimization, you can ensure your robot performs flawlessly while staying within budget.
At YL-Machining, we specialize in helping creators like you manufacture high-quality parts. What’s your next robotics project? Let’s discuss how we can make it a success!


